Converting tabular data to RDF: Convert CSV to RDF
Now that we have CSV files, our next task is to convert them to RDF. To narrow down the concerns considered in this step we perform only syntactical conversion to the RDF data model. We separate further post-processing of the data into the subsequent steps.
-
open_withSample CSV input
NUTS_3 LAU1_NAT_CODE LAU2_NAT_CODE CHANGE NAME_1 NAME_2_LAT POP AREA sheet_name FI194 146 005 no Alajärvi Alajärvi 10006 1056740000 FI FI196 041 050 no Eura Eura 12128 630200000 FI FI193 131 592 no Petäjävesi Petäjävesi 4008 495420000 FI
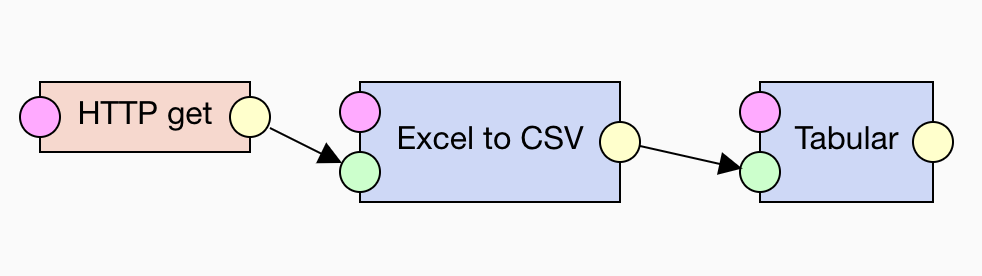
LP-ETL provides the Tabular component for turning CSV into RDF. Tabular implements the standard mapping specified in the W3C Recommendation Generating RDF from Tabular Data on the Web. There are several options that allow us to customize the output of this component.
The option Table has header row is on by default and we leave it as such, since our CSV inputs contain headers with column names.
However, some of the sheets converted to CSV contain empty columns and, consequently, their headers are empty too.
Tabular would raise an error when provided with an empty header, since it needs a column name to generate an IRI for the RDF property the column values are mapped to.
We could work around the empty columns by switching the Table has header row option off.
In that case, Tabular would treat the first row as data and would instead generate synthetic property IRIs based on the numeric column indices (i.e. column_1 column_2 etc.).
Nevertheless, in this way we would lose the associations between the column values and their meaning.
We could hardwire the associations to the generated column names, but in our case the order of columns may change per sheet, so hardwiring is infeasible.
We can handle the empty columns by switching on the Generate names for null header cells option.
It instructs Tabular to generate synthetic names for empty headers.
Since the values in the empty columns are missing, switching this option on effectively ignores these columns.
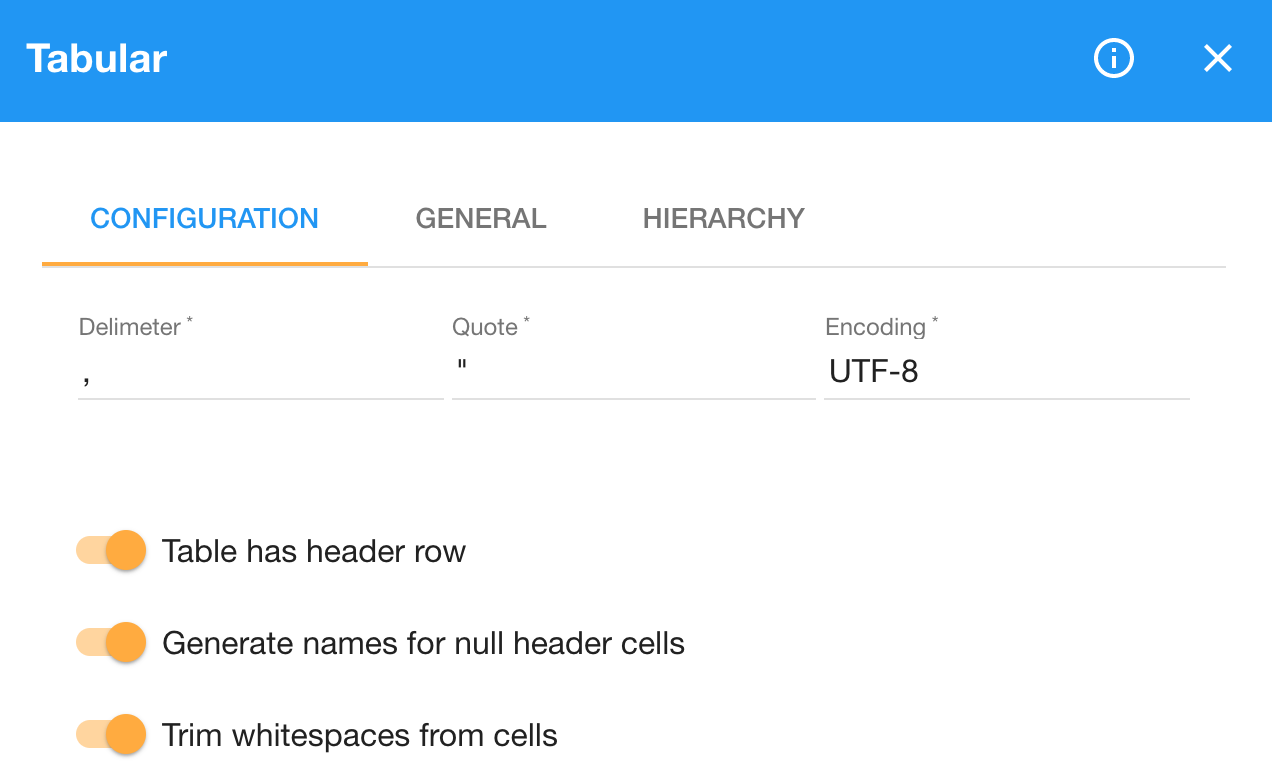
We also turn on the option Trim whitespace from cells to get rid of insignificant whitespace.
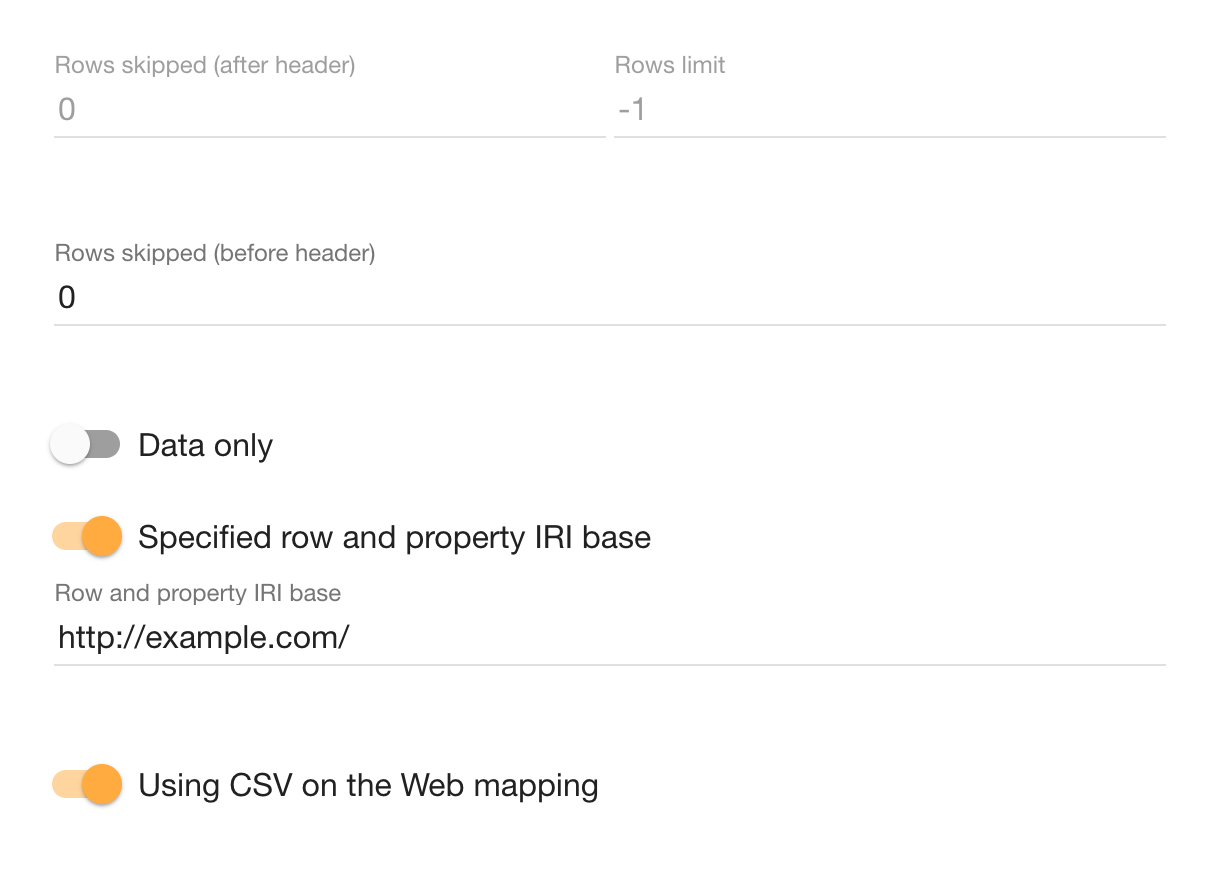
Instead of the Default row and property IRIs we specify a fixed property IRI base.
We choose http://example.com/ as a placeholder namespace to use for the IRIs of properties.
The particular choice of a namespace does not matter in our case, since we treat Tabular's output as intermediate data, subject to further processing.
If we do not provide this option, the default row and property IRIs are derived from the input's file name.
Since we have multiple CSV files, Tabular would generate different IRIs for the same columns shared across the files.
Providing a fixed namespace avoids this problem, so that columns sharing the same name end up using the same properties.
We leave the rest of Tabular's configuration as is by default. If the input had a column with a unique key for each row, we could use it directly in the IRI template to generate IRIs for the output rows. As we learn later in this tutorial, our dataset has keys spread in multiple columns, so we stick to the default blank nodes for rows and generate IRIs in later processing. We do not need to skip any rows, but the Rows skipped options can be employed to ignore the header row and generate synthetic property IRIs instead. We use the default option Data only since we do not need to generate structural metadata about the input CSV files. Finally, we keep the switch Using CSV on the Web mapping on. Instead of providing a custom mapping directly in Tabular, we map the data in follow-up data processing.
-
open_withSample RDF output
@prefix : <http://example.com/> .

[ :AREA "1056740000" ;
  :CHANGE "no" ;
  :LAU1_NAT_CODE "146" ;
  :LAU2_NAT_CODE "005" ;
  :NAME_1 "Alajärvi" ;
  :NAME_2_LAT "Alajärvi" ;
  :NUTS_3 "FI194" ;
  :POP "10006" ;
  :sheet_name "FI" ] .

[ :AREA "630200000" ;
  :CHANGE "no" ;
  :LAU1_NAT_CODE "041" ;
  :LAU2_NAT_CODE "050" ;
  :NAME_1 "Eura" ;
  :NAME_2_LAT "Eura" ;
  :NUTS_3 "FI196" ;
  :POP "12128" ;
  :sheet_name "FI" ] .

[ :AREA "495420000" ;
  :CHANGE "no" ;
  :LAU1_NAT_CODE "131" ;
  :LAU2_NAT_CODE "592" ;
  :NAME_1 "Petäjävesi" ;
  :NAME_2_LAT "Petäjävesi" ;
  :NUTS_3 "FI193" ;
  :POP "4008" ;
  :sheet_name "FI" ] .
The pipeline that includes the steps described so far in the tutorial can be downloaded here.